Elongated Stars – a very complex problem to solve

For those of you who have been following my blog, you know that have been experiencing difficulties with being able to capture images with nice round and tight stars (i.e. sharper images).
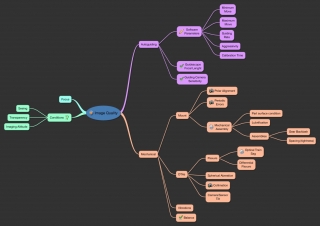
There are many factors that can contribute to image quality. If one or more of these factors are present in your setup. You can end up with elongated stars and less sharp images. The following diagram illustrates the various factors affecting image quality. Some of these factors contribute to star elongation.
In my particular case, I was afflicted with the following ones:
- Flexure of the optical train (i.e. focuser drawtube sagging under gravity)
- differential flexure (my guiding scope/camera rig was not attached securely enough to the main imaging scope)
- And finally, focal length of the guide scope being not long enough for the main imaging scope
- There have been many discussion on many forums trying to address this question (i.e. how long the focal length of the guidescope should be compared to the main imaging scope focal length). I will not re-start a discussion about this here. What I did is test with my own equipment if I would get better results with a longer focal length guidescope by using a simple 2X barlow in front of the guiding camera.
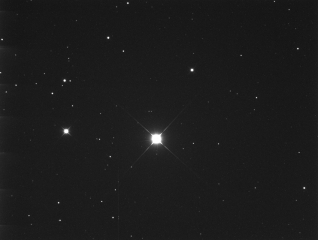
The following image was taken while guiding at 960mm (Starshoot Autoguider, 480mm focal length guidescope and a 2X Celestron barlow). Finally, the stars are very round and compact.
Here is the more “technical” part of this post.
- Imaging scope focal length: 1625mm
- Imaging camera pixel size: 5.4 X 5.4 Microns
- Image scale (i.e. area of sky seen by each pixel): 0.685″ (arc-second)
Versus
- Guiding scope focal length: 480mm
- Guiding camera pixel size: 5.2 X 5.2 Microns
- Image scale: 2.235″
- Image scale with 2X barlow (assuming 960mm focal length): 1.117″
Using the 2X barlow, I was able to guide within ± 1 pixel. The guiding was therefore within 2.234″ (i.e. 2 pixels X 1.117″)
This means that the imaging scope/camera were guided within 3.26 pixels (i.e. 2.234 / 0.685).
Without the barlow (i.e. guiding at 480mm), the imaging scope/camera were guided within 6.53 pixels.
3.26 pixels of movement vs. 6.53 makes a lot of difference in the resulting image star shapes as seen in the image above.
However, doubling the focal length with a barlow lens also means that the f-ratio gets higher (i.e. less light entering the guiding camera at f12 than f6). The guiding camera I was using is the Orion Starshoot Autoguider. This is a good guiding camera, however, its sensitivity is somewhat limited. At f12 it became a lot more difficult to find guidstars in the guidescope field of view due to this loss in luminosity. Here is how I am currently addressing this:
- Sold the Starshoot camera.
- Bought a more sensitive one from QHYCCD (QHY5L-II monochrome). This camera is about 3 times more sensitive than the other according to the chip manufactuers specs. I haven’t received it yet.
I will post further results once the camera is here and when the sky clears for a test shot.
Thanks for reading this never-ending journey.
Clear sky!
Follow Clearskypix - 3D Printed Astronomy Parts and Accessories on Facebook.


